Showing posts with label valentines. Show all posts

Tuesday, January 25, 2011

Homemade Oreos Baked with LoVE!

I've seen the cupcake or cookie stencils you can buy in the store but never gotten them... I had a little wooden heart that I placed on top of my oreos and then sprinkled them with a shaker of powdered sugar and LOVED the results. A stencil can be easily made or just find the object you want to have imprinted!
I am LOVING my I-phone so these pics aren't great, but are the only ones I got before the cookies were gobbled up or taken out to friends and neighbors.
Have the oreo recipe? If not here it is- super easy and the kids LOVE help make them... mixing the ingredients, rolling the balls, helping frost and sticking the cookies together, and even doing the powdered sugar! FUN! ;-)

Homemade Oreos
2 boxes Devi's Food cake mix
1 1/2 cup shortening (love the pre-packaged kind!)
1 tsp vanilla
4 eggs

Frosting:
8 oz cream cheese
1 cube margarine/butter
4 to 4 1/2 cups powdered sugar
1 tsp vanilla

Mix together and then roll into small balls. Place on an ungreased cookie sheet. Bake at 375 for 6-7 minutes... but don't overcook! They should look moist and soft. Cool and then frost!

(NOTE: Mini oreos can be made by measuring out batter with a tsp- then roll in balls. Cook time is 4-5 minutes. These oreos were made with a TBS and took 6 minutes. I think the easiest way to frost is in sandwich bag! Load with frosting and cut corner off- less mess, looks better, and super quick!)

Friday, January 7, 2011

Just around the Corner... Valentines Day!

Valentines Day will be here before you know it... start decorating and picking out or making those special gifts... and cooking now! Ha. Ok I still need to take my Christmas tree and stockings down but have already been scheming of what fun treats... decor... and gifts I will do this year... (Here are a few ideas from last year:

Bakerella made these tasty looking Red Velvet Homemade Oreos last year... I think my kiddos would definitely go for these... They would love to make them too! http://www.bakerella.com/easy-and-easier-valentine-treats/

Crate and Barrel always has great cupcake papers- the grease doesn't seep through like the cheapo ones at the grocery store so the wrappers still look cute when they are cooked...Yummo- made these brownie bites last year and can't wait to make them again!

A simple way to decorate your kitchen/living area is to hang hearts from your lights/chandelier. I did this last year with some shabby chic tin hearts but feel like they need to be blingier (is that a word!?!) and sassy this year! We will see if I switch them out... Hang them with fun ribbon, yarn, or even fishing wire!
I love this idea of a Valentine Bunting! So cute... I found this idea at http://fortandfield.blogspot.com/2010/01/valentine-bunting.html... This would make a great decoration for any party as well.

Gotta love Target. From wrapping paper to treats and decor they have reasonably priced fabulous Valentine Finds! Love these bowls... and way cheaper than Pottery Barn Kids!

Made this last year... Directions at http://kamibuchanan.blogspot.com/2010/01/valentine-tulle-wreath.html.

Found these yummilicious heart whoopies at Williams Sonoma... Could easily be remade in those silicone pans you see at the Craft Stores.


Here's a fun Valentine Centerpiece... Whimisical and fun even as a gift idea! Link for creating this here:http://fortandfield.blogspot.com/2010/01/valentine-centerpiece.html.
Every year for Ger I do a "Year Full of Reasons We LOVE You" Calendar. I don't know if I will get around to it this year... but it is a great gift idea!


Cupcakes are always a hit... http://fabdoverlife.blogspot.com/2009/02/cupcakes.html

Year before last year I went a little crazy over valentines... check out the post here for more ideas!
http://fabdoverlife.blogspot.com/2009/02/valetines-gift-ideas.html
or scroll down for more ideas through Feb 2009 Archives!
http://fabdoverlife.blogspot.com/2009_02_01_archive.html

Send along any fab ideas you have! I would love to be inspired!

Thursday, February 11, 2010

Valentines FHE

Growing up one of our favorite Family Home Evenings was the one where my mom got us all nerf guns and we got to have a big nerf fight throughout the house. Running around, picking teams, making quick forts, hiding behind couches... it was ALWAYS lots of fun. And while the nerf gun war was pretty exciting, the lesson just as memorable... so it was so fun to do it this week as our FHE ! And it actually has to do with Valentines Day so stick with me. ;-)
So Monday we had our nerf disc war (this guns are AWESOME and rapid fire- the kiddos had a blast!) and told the kiddos to try and hit each other as many times as they could and count how many times they hit someone. After 5-10 minutes of scrambling, hiding, running, re-loading we chatted about it... I asked, "How did it feel when you guys hit someone?" To my great surprise they ALL said, "Sad." I said "How did you feel when YOU were hit?" Same answer. They all said, "Sad." Then talked about when we go out in the world, there are many "fiery darts" of the adversary. They attack each of us and come in many ways, shapes, and forms. For each disc I held up the kids talked about some of these fiery darts- friends being mean, being called names, being made fun of, lying or being told lies, cheating, friends hitting or kicking us (Colby of course mentioned this one), being tempted to make a wrong choice, people not respecting us, etc etc. We talked about how we should never fire these fiery darts at our friends and briefly talked about being peacemakers and how to deal with those darts, but then talked about how AT HOME THERE SHOULD BE NO FIERY DARTS! Our home is a safe haven- where we are protected from the fiery darts and should be a place where we build and strengthen ourselves and one another against the world. The home is where we should feel total peace and nothing but love and safety.
Sydney then took over FHE and talked about LOVE with pictures and scriptures. Ways that we can show more love and respect for one another, how Jesus set the ultimate example for us with his love and kindness to everyone, and how it is a commandment to love one another. We talked about how the most important people in this whole life is our family. That good friends are very important but that our family is ETERNAL- we will live with each other forever so these relationships are so important!
We talked about it being Valentines Day and to show each other how much we loved each other, we were going to make mailboxes and fill them with Valentines from each other throughout the week. I LOVED these, but obviously didn't have time or means to make them. ;-) Here is another one...
So cute! Hopefully next year!

Ours were still cute and the kids loved making them... we cut two identical hearts out of cardstock, punched holes in the outside, and strung yarn through the outside. Then we decorated them and added our names... and hung them on our doors. I printed up a bunch of blank Valentines- find a list of cute ones here...http://thelongthread.com/?s=valentine&submit.x=0&submit.y=0&submit=Search
The kids have loved being secretive and surprising us and each other with notes! They have drawn pictures and listed so many great reasons they love each other.
So I think it was a very memorable lesson for the kids! We really feel blessed to have such good kids who are overall very sweet and loving and kind to one another. They all play together so well and time outs around here are rare. Hallelujah! But especially with the thought of bringing another little one in to our family, Ger and I feel blessed that our baby will get so much attention and love from her siblings. She will be a spoiled little girl I think!
But this FHE and Valentine Mailboxes will be a fun tradition we will now look forward to every year! What are your Valentine's Traditions?!?

Monday, February 8, 2010

Valentines Made? Check!


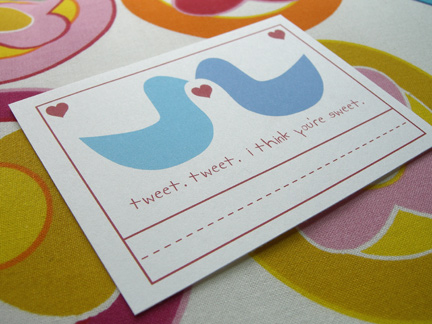
This weekend the kids were thrilled to do their valentines for their classes! I found these cute online ones that I thought I would share. Find the links to print them at http://thelongthread.com/?p=2373
I thought the bird one would be great for preschoolers who need the lines to write in their names...
Go to http://www.regiscorp.com/coolcuts4kids/bee-valentine.pdf for some adorable bee valentines. Sydney chose to do the Bee one at the bottom of the page that is blue with fun whimsical flowers! Just copy and paste into word, crop image for what ones you want to use, then resize...

These adorable sucker vday cards can be found at http://bunnycakes.typepad.com/bunny_cakes/valentines_day/


Happy Creating!

Sunday, January 24, 2010

Valentines Day Decor!

I had a chance this week to pull out some of our Vday stuff... If you have access to a Cricut these signs are super easy and fun to make! The hearts are from Joann's- I still need to add a bow or something above them...
Instead of traditional reds and pinks and whites and I wanted lots of fun colors so my candy jars have red, blue, pink, green, yellow... Gumballs, big lollipops from Wal-mart, and big pink heart shaped Marshmellows from the Dollar Store. (the kids LOVE these so the jar is already more than half gone- bah!)

I posted a wreath a few posts ago made out of tulle and made one of my own this week- adding ribbon. Super easy. Hobby Lobby has ribbon half off right now and has so many fun colors and patterns. Get a styrofoam wreath at a craft store, whatever tulle you need (the 6 inch rolls are the easiest!), a cute sign for the middle, and ribbon if you want...
Then just tie the tulle onto the wreath. I tied ribbon alternating in every other piece of tulle- and just cut a few short inches and tied it into the tulle- you don't tie any knots in the ribbon, just place it on top of the tulle when you tie it into a knot. It's super easy but takes a few hours- so do it in front of one of your favorite shows and it will go super fast. I cut my tulle into 9-10 inch pieces (from the 6 inch rolls) but you can do longer if you want...

Then I just picked up these hearts at Jo-Anns for 40% off! Only $6 each and they are huge and thick and seem heavy duty. I wish they had a bigger wreath since our door is so huge but it works fine! Do the hearts need bows above them? I just stuck them up since i was on a time crunch so may get more creative this week with it!
I made some yummy Valentine Day treats I will post soon... and also a great gift idea! Hope you've all had a great weekend!

Sunday, February 8, 2009

CUPCAKES!

I love it when you can keep things simple when cooking, but make the recipe taste FABULOUS by just a few little tricks. This white cupcake recipe is just that- you use a basic White cake mix but then just add sprite and a jello pudding mix. Here's the recipe!

Simple Sprite Cake
1 white cake mix
4 eggs
3/4 cup vegetable oil
1 box instant vanilla pudding (3 oz. size)
8 oz. can of Sprite (the mini one)
1. Preheat oven to 350 degrees.
2. Grease and flour 2 9 inch cake pans OR put papers in 24 muffin pans.
3. Mix ingredients on low until combined and then increase speed to medium and mix for about two minutes.
4. Pour batter into pans and bake for about 30 minutes in 9 inch pans or 20-22 minutes for cupcakes. Insert a toothpick and they are done when it comes out clean.
Butter Lane's Chocolate Cupcakes
Butter Lane Cupcake Shop came to the Martha Stewart Show and showed how to make one of their most popular cupcakes- chocolate! They won Martha's taste test and they are THAT good. Seriously. They are a little work, but with ALL the right ingredients- cake flour, unsalted butter- the recipe is really not too hard and is divine. Fluffy and perfectly chocolatey. I promise you will love them!
Makes 40 cupcakes.
2 3/4 cups cake flour (not self-rising)
1 teaspoon baking soda
1 teaspoon baking powder
1/2 teaspoon salt
2 1/2 cups sugar
1 cup (2 sticks) unsalted butter, room temperature
6 ounces unsweetened chocolate, melted and cooled to room temperature
4 extra-large eggs
1 tablespoon plus 1 teaspoon pure vanilla extract
1 cup sour cream
Directions:
1. Preheat oven to 325 degrees. Line 40 standard muffin cups with cupcake liners and set aside.
2. In a medium bowl, whisk together flour, baking soda, baking powder, and salt; set aside.
3. In the bowl of an electric mixer fitted with the paddle attachment, cream together sugar and butter until light and fluffy, 3 to 5 minutes. Add chocolate and beat on medium speed until well combined, 1 to 2 minutes. Add eggs, 1 at a time, mixing well after each addition. Add sour cream and vanilla and mix until well combined, 1 to 2 minutes.
4. With mixer on low speed, add flour mixture in three parts, alternating with 1 cup water and beginning and ending with flour; beat until just combined, 1 to 3 minutes.
5. Fill prepared muffin cups three-quarters full with batter. DO NOT OVERFILL. Transfer to oven and bake for 10 minutes. Rotate muffin pans and continue baking until a cake tester inserted into the center of a cupcake comes out clean, about 10 minutes more. (They still almost look wet when they are done- see below pic!) Let cool completely before frosting. As you can see in the chocolatey bowl above, I use a ice cream scooper to fill my cupcake liners! No mess, just the right amount, and so easy. For the mini cupcakes- which I LOVE because they are so fun to decorate- I use a TBS measure. Scoop the batter out the TBS with another spoon or spatula.

Buttercream Frosting
1 1/2 cups (3 sticks) butter, softened
2 teaspoon pure vanilla extract
1 2lb. bag powdered sugar
3+ teaspoons milk, half and half or cream
Using a mixer, cream softened butter and vanilla with until smooth.
Add sugar gradually, allowing butter and sugar to cream together before adding more.
If you want it a little creamier, add a teaspoon of milk at a time and beat on high until you get the right texture. BEAT WELL! I beat my frosting on high for 5-10 minutes until it is well whipped! If you want Chocolate Frosting add 3 TBS chocolate, to taste
.

To frost mini cupcakes like seen above, you can either use a large round tip on a frosting bag, or use a sandwhich baggie with a good sized corner cut off (see below!). Immediately after frosting, sprinkle with sprinkles and then place M&M on top (with M&M facing down). The girls LOVED helping make these. Let your kids get involved! It's actually minimal mess when you give them a baggie filled with frosting that is zipped shut with just a good size corner cut out.
To make the sucker cupcakes, tie ribbons to suckers... pour sprinkles in a bowl... then frost cupcake with just a knife... dip cupcake top in sprinkles... then push sucker into cupcake! You can do these for birthdays as well by doing just a round sucker and making a leaf shape out of fondant or green candy or using a mint leaf.My very favorite frosting tip is the 1M Star by Wilton. I used it to frost the cupcake on the bottom right. It is only a few dollars for the large coupler and the tip and is well worth the money! You will have to get the 16 inch bags for it, instead of the smaller 12 inch frosting bag. because it is a HUGE tip. It makes your cupcakes look so professional though- look below- so cute. ;-) The chocolate heart is made using the candy molds talked about in the chocolate blog post. DO NOT place cupcakes in the fridge. This takes out their moisture and dries them out. They can be placed in the freezer, without frosting, tightly wrapped in seran wrap for up to 1 month. I'm not sure how well they freeze with frosting?